

how to draw a muscular arm
How to draw an arm

Learning how to draw an arm that looks realistic is a vital part of a life drawing. The layers of complex anatomy need to be accurately portrayed, and succeeding at this whilst conveying a sense of movement and strength is no easy feat.
In this guide, we'll be studying the arm, particularly the twisting (pronated) forearm. The arms, if drawn gesturally, can have a rhythmic appearance. If the gesture of the anatomy isn't taken into consideration then they can look stiff due to their structural up-and-down hinge movement. The hinge joint is the elbow of the lower arm's ulna bone fitting into the spanner-like condyles of the upper arm's humerus bone.
For more step-by-step drawing guides, check out our rundown of the best how to draw tutorials, our spotlight on figure drawing, or you could focus on improving your pencil drawing techniques.
Before we start with how to draw an arm, let's examine what happens if you don't get your drawing correct.
The Three Hells
Gesture, structure and render are everything we need to create heavenly drawings, but these three components can be hellish if unbalanced. When we rely too much on gesture, our figure drawings become floppy and boneless. This is gesture hell. And if we rely too much on structure our drawings become wooden and stiff – welcome to structure hell. If we use render to hide poor gesture or structure then our drawings will look laboured and dull. This is the worst hell. We're all sinners at one point or another, and arms are a particularly difficult body part to get right.
Check the study sheet at the end for anatomy landmarks and proportions as you go, but for now let's starting learning how to draw an arm.
Click on the icon at the top-right of the image to enlarge it.
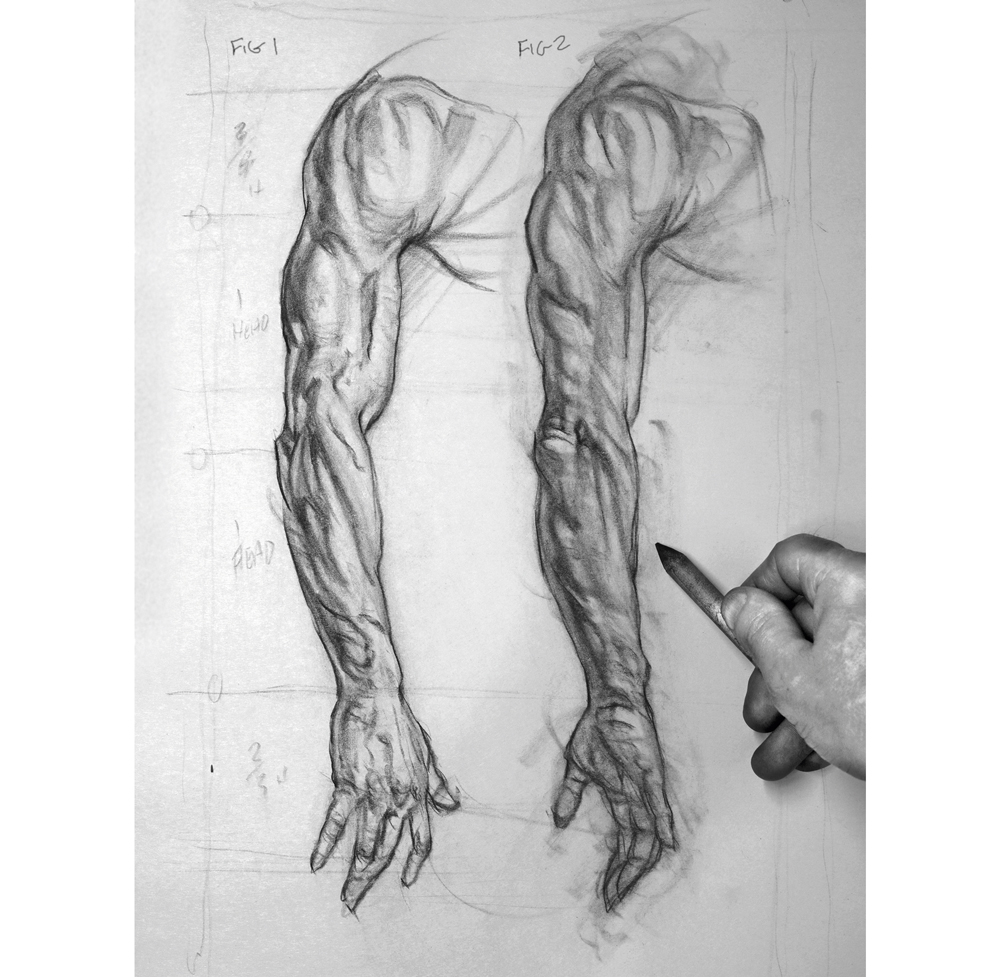
01. Follow the twist
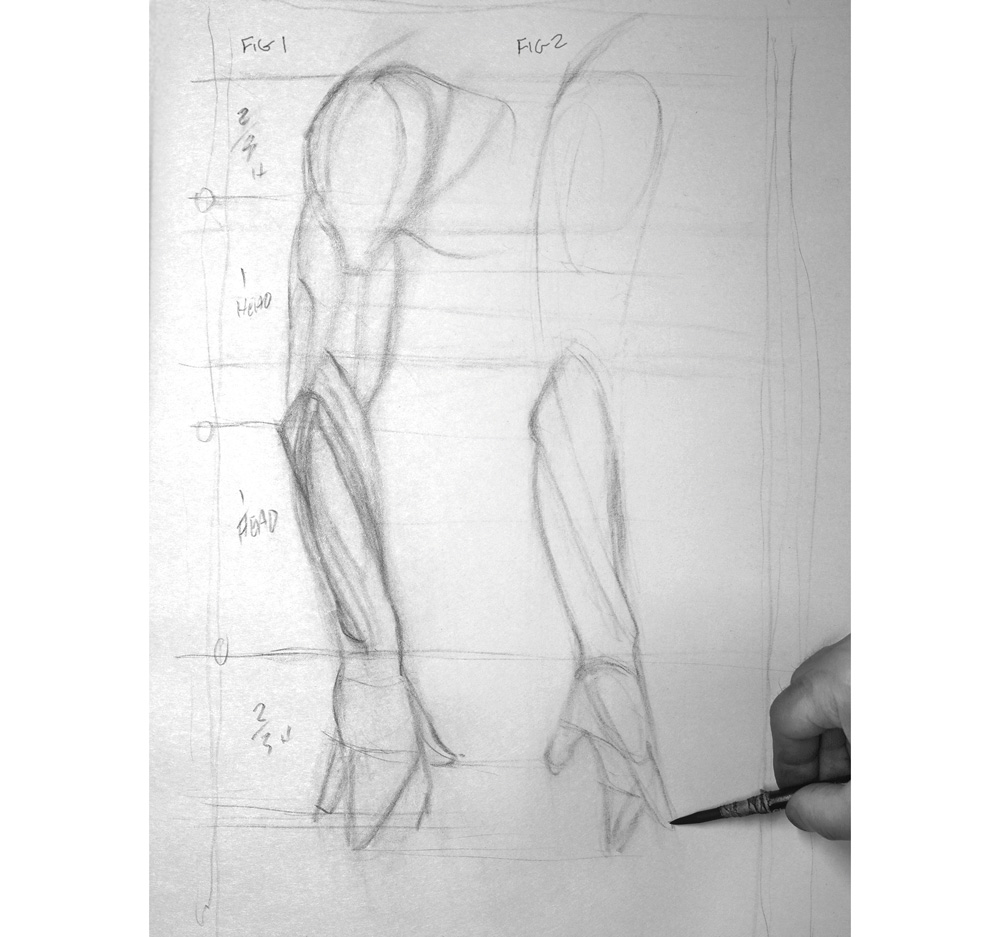
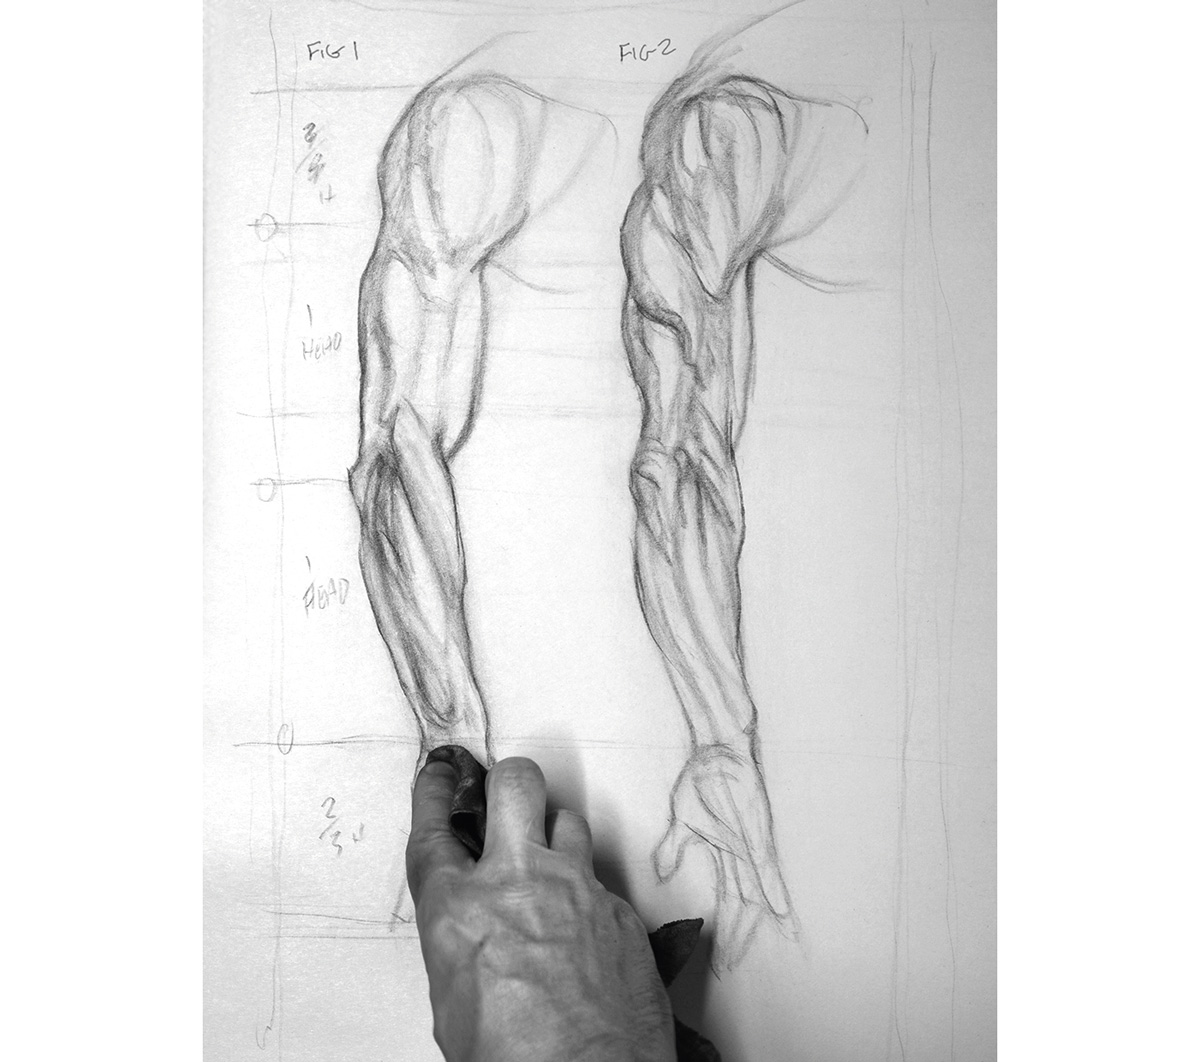
Looking at the twisted arm study (right), you can see how the straighter arm study (left) was started with broad gestural shapes, from the large deltoid top to narrower wrist at the bottom. This is gesture heaven. Note how much twist the wrist is capable of by following the ulna (elbow) bone.
02. Develop a good plot
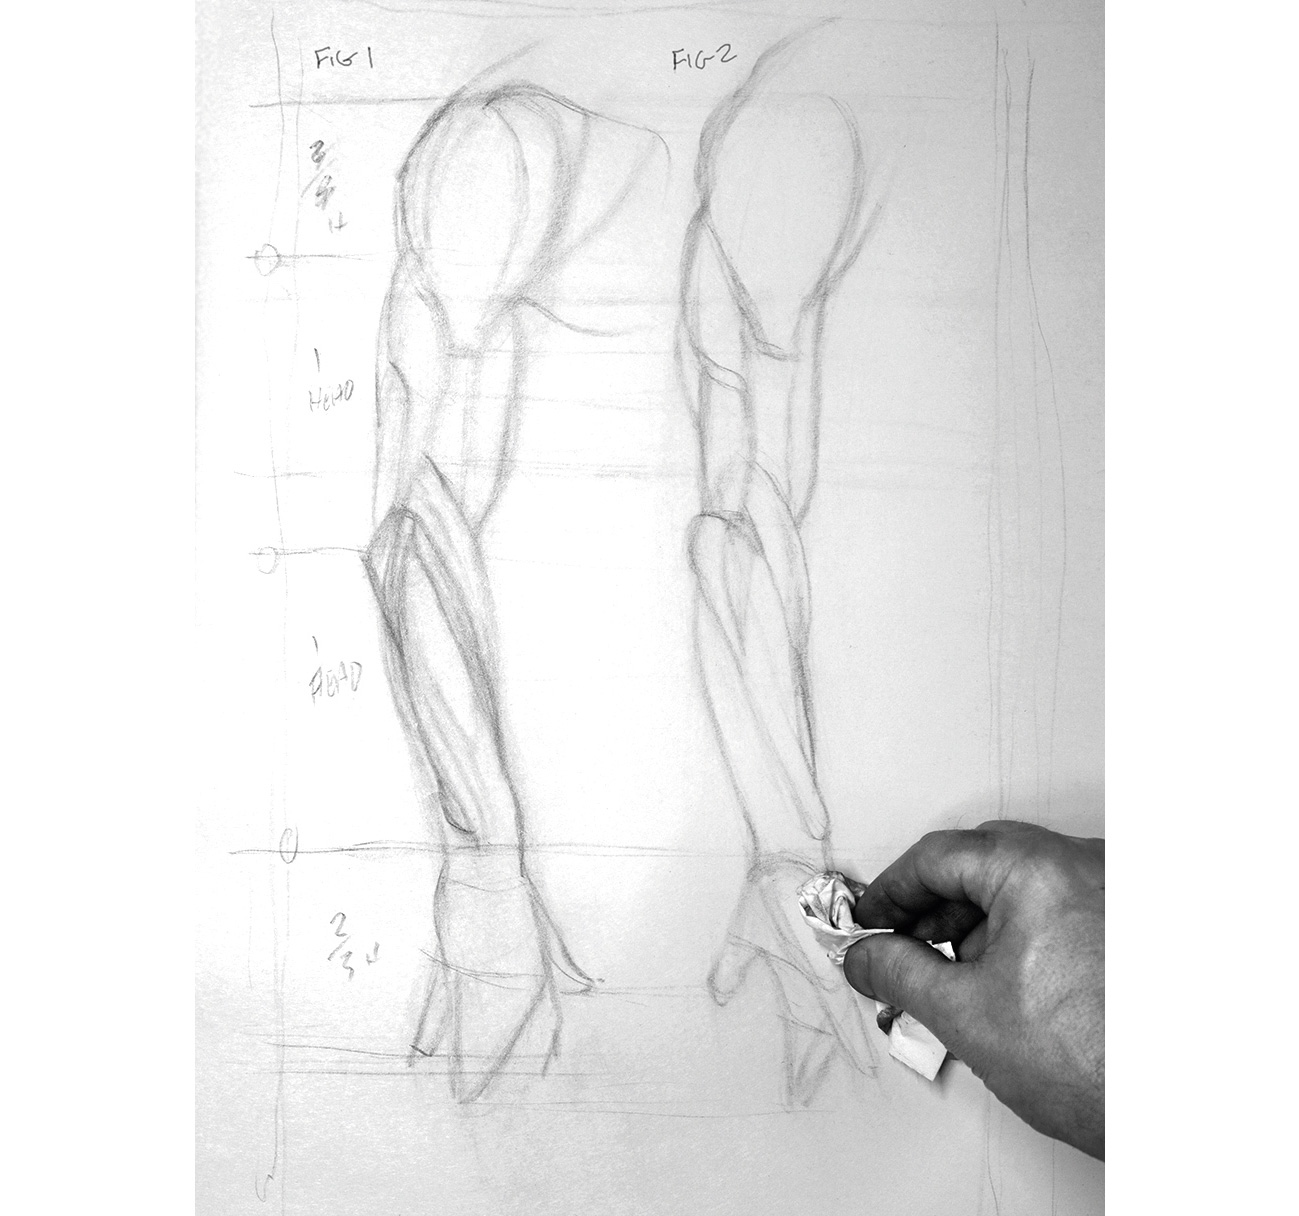
Having plotted out the basic structural shapes, based on simple anatomy, I wipe the drawing back to a ghost form with tissue. This creates a faded road map for me to articulate the more sophisticated lines and tones to follow. I add proportional head-size based divisions to help control the length.
03. Stay sharp
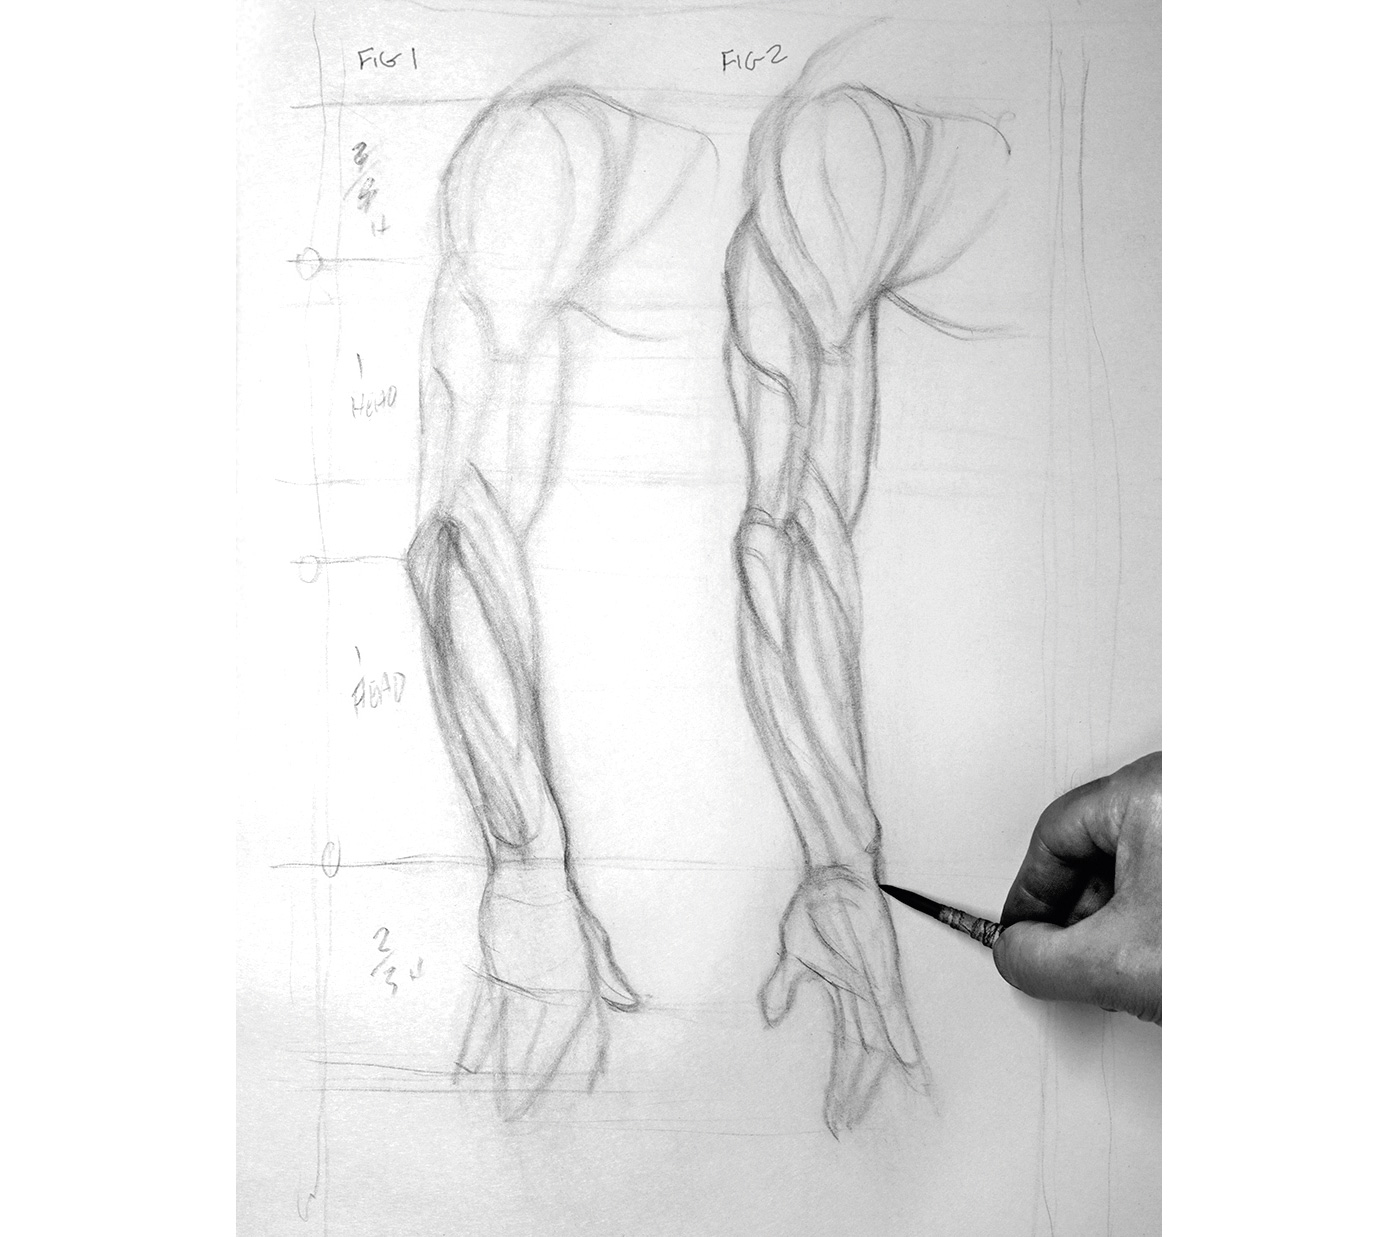
I keep my pencil lead long and sharp, which helps keep my lines long, gestural and accurate. With the faded structure lines underneath I have the confidence to make each line more gestural and fluid on top. This also gives me the chance to improve the anatomy with every stroke.
04. Soften the flesh
I lay in some forms with the pencil edge, then soften the forms broadly with a shammy leather cloth to create an early feel for the softness of flesh. Notice in the right-hand drawing how the muscles are bunching upward due to the twist and flex of the forearm.
05. Keep in mind the hierarchy of muscles
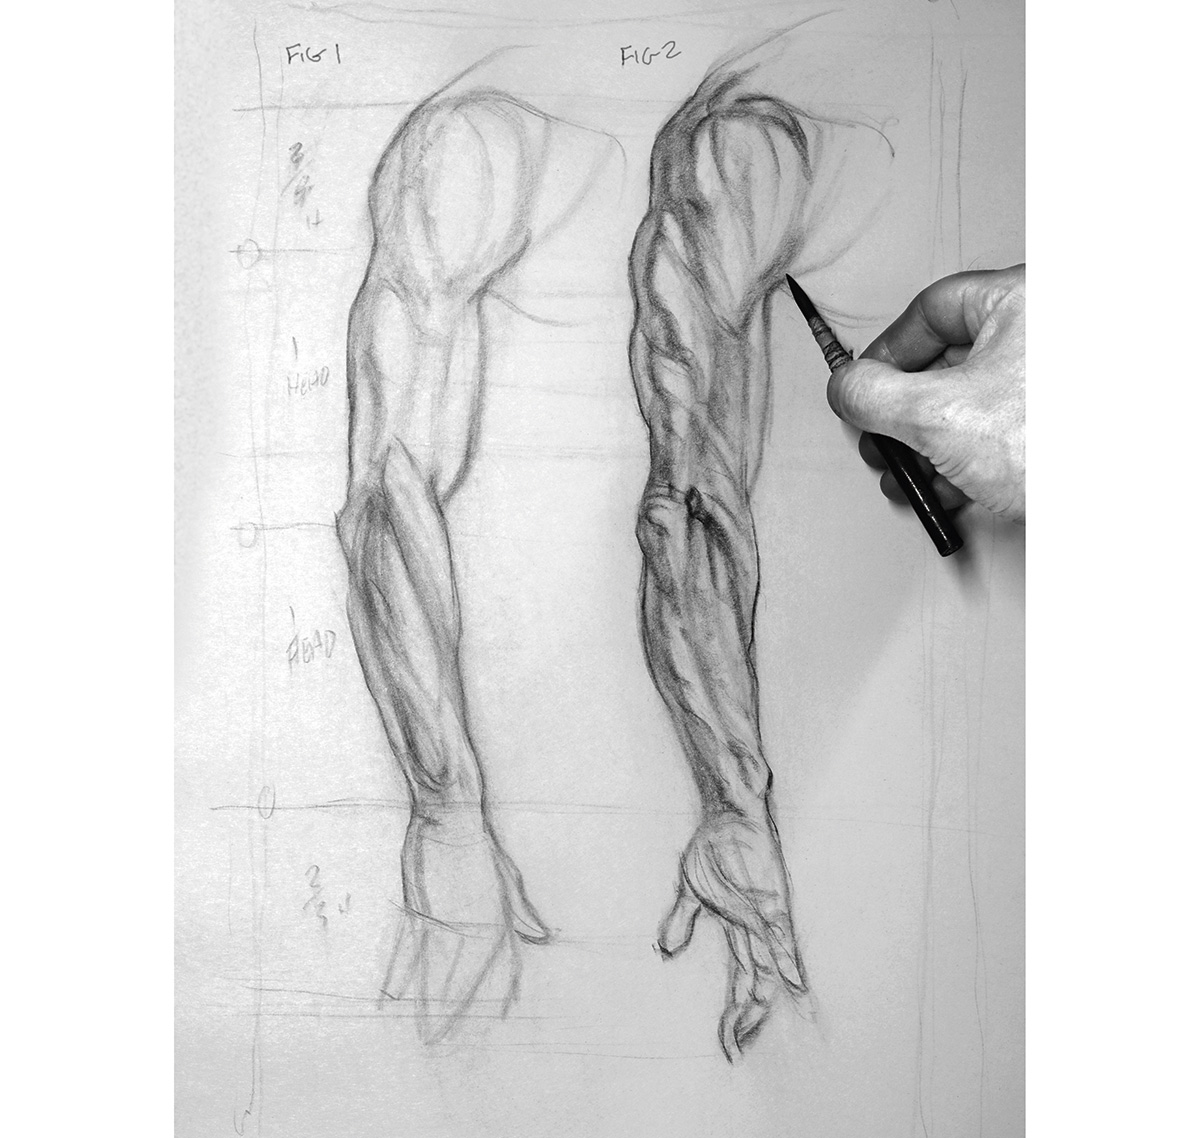
Here the study begins in earnest. At this point I'm overlapping the pectoralis muscle across the biceps, but under the twisting deltoids. Knowing the hierarchy of muscles helps me understand depth and form. 'The deltoid is king' is a good phrase to remember for the arm
06. Get ahead in anatomy studies
Here I seize the chance to draw some digits in detail – a luxury that life-drawing classes don't always have time for. To sight the length of a hand I compare the bottom of the nose to the top of the head. I also use a measurement of three-and-one-third heads from shoulder to fingertips.
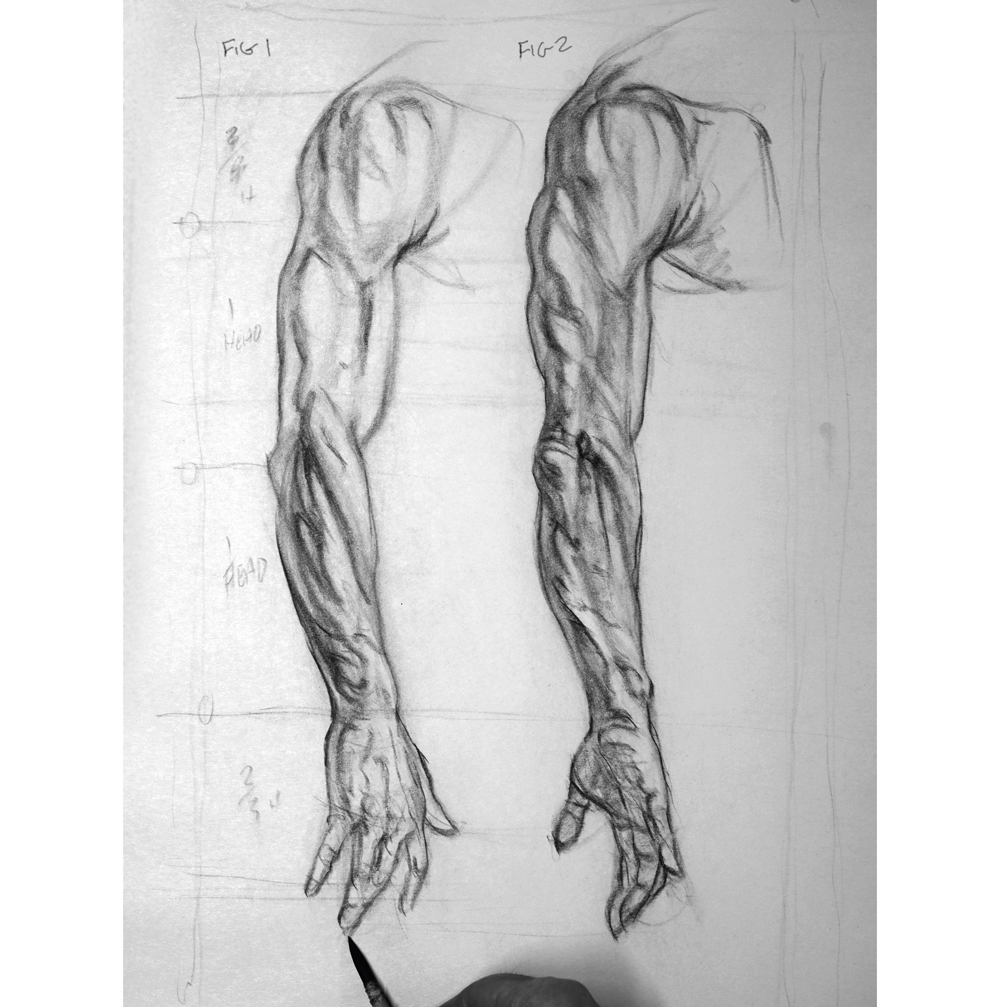
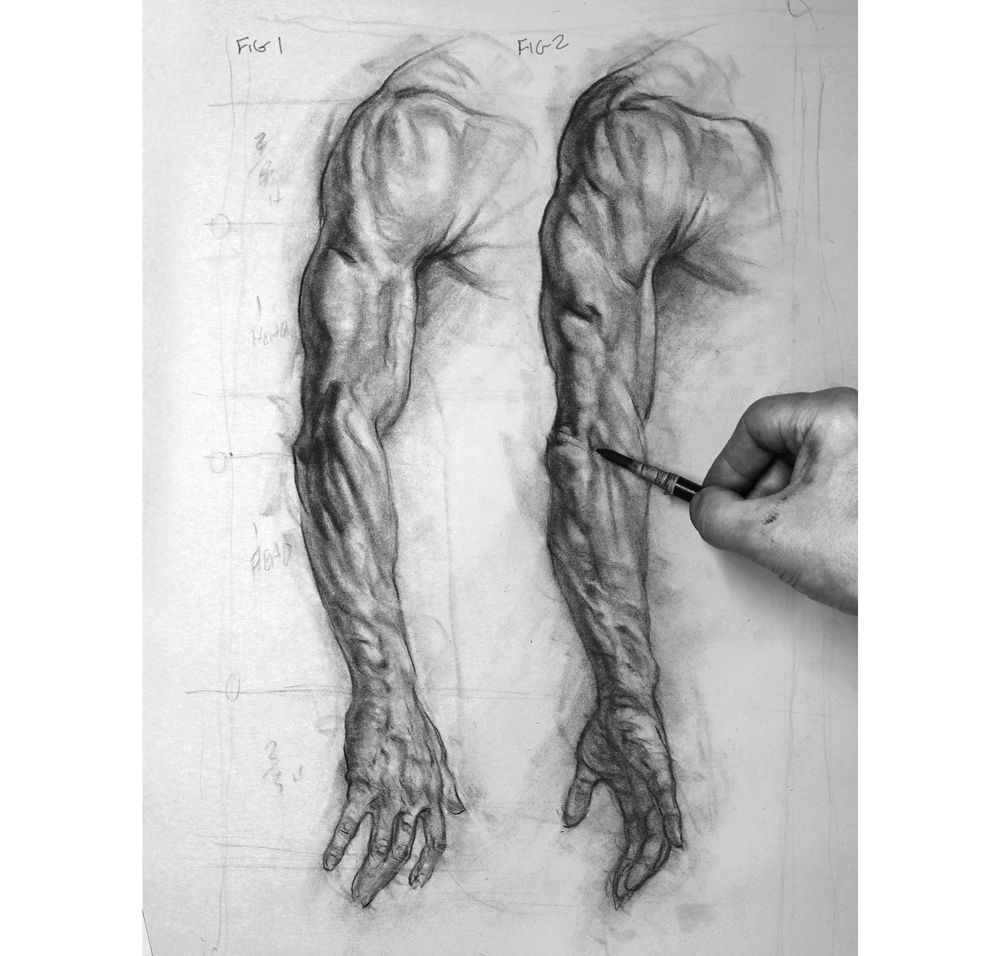
07. Capture the twisting of arm muscles
At this stage of drawing my arm, I work on both arm studies at once, going back and forth as I shade the curved forms. Doing this helps us understand the twisting and bunching of fibrous muscle as the arm turns. At this point we are in gesture and structural heaven. Considered study has kept us from falling into both gestural and structural hell.
08. Stay out of render hell
I use a paper stump to blend and render tone. This is a dangerous place as we can easily screw up our solid structure by over-blending and softening the edges so much that we slowly change the form without noticing. This is what I mean by render hell. Of the three hells, this is the most fearful and destructive.

Here are the bones that live under the muscles. The white dots indicate where they meet the surface. The main sorcery to note is how the flat-ended radius bone has twisted across the ulna bone to bring the thumb to the back, while pulling the forearm muscles with it.
10. Focus on the ball and socket
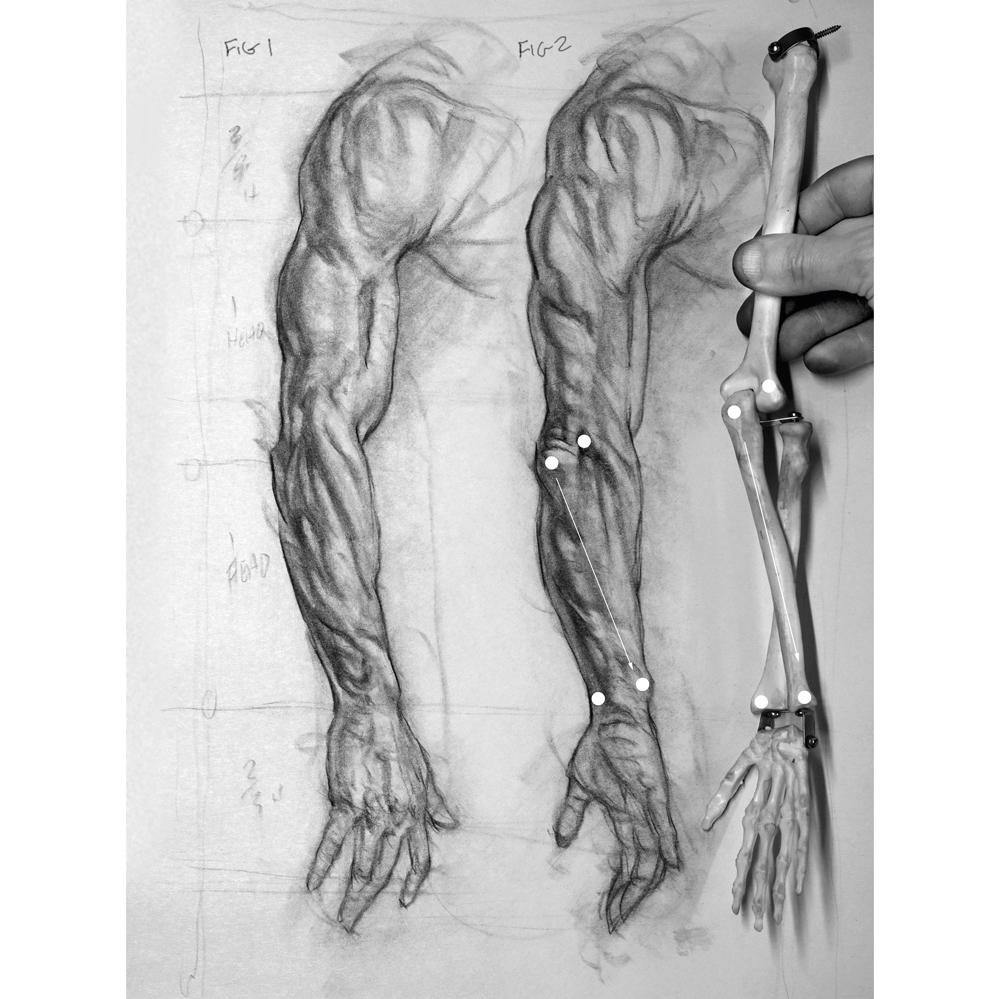
While the forearm is doing most of the turning, the humerus bone of the upper arm follows to a lesser degree as it rotates inside the shoulder and twists the deltoid. The rotation occurs via the ball and socket joint-connection of the scapula called the glenoid process.
11. Don't sweat the small stuff
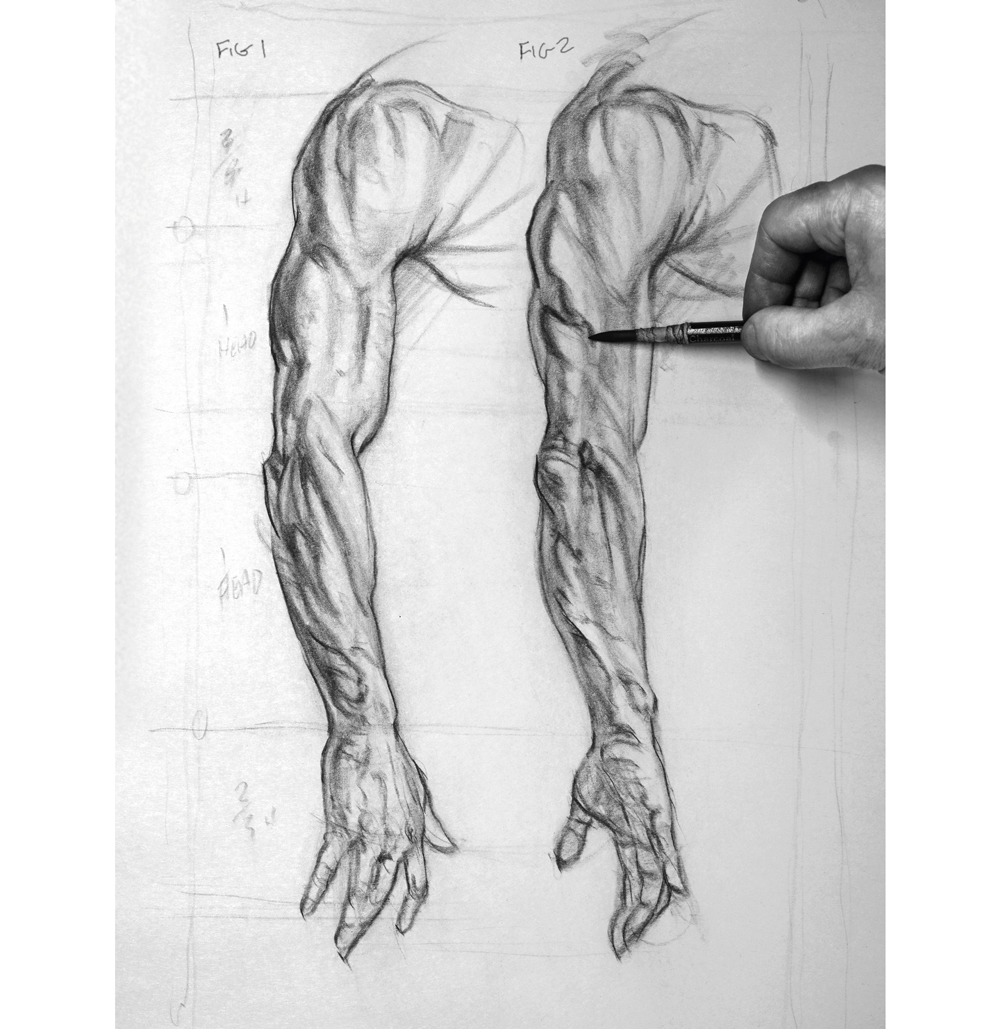
The other problem with render hell is that we tend to focus on the small stuff and lose sight of the big picture. To avoid the stiff quality of slow-cooked render hell, I render gesturally, following the form with pendulum-like rhythmic strokes, moving back and forth, all the way down the arm.
12. Blur the lines
Here I'm using a pencil eraser to 'draw' the highlights. It's worth noting that I rarely use erasers to erase errors. I prefer to fade lines with tissue and keep drawing. If I make an error that requires major erasing, I find it's simply better to start again with fresh rhythm.
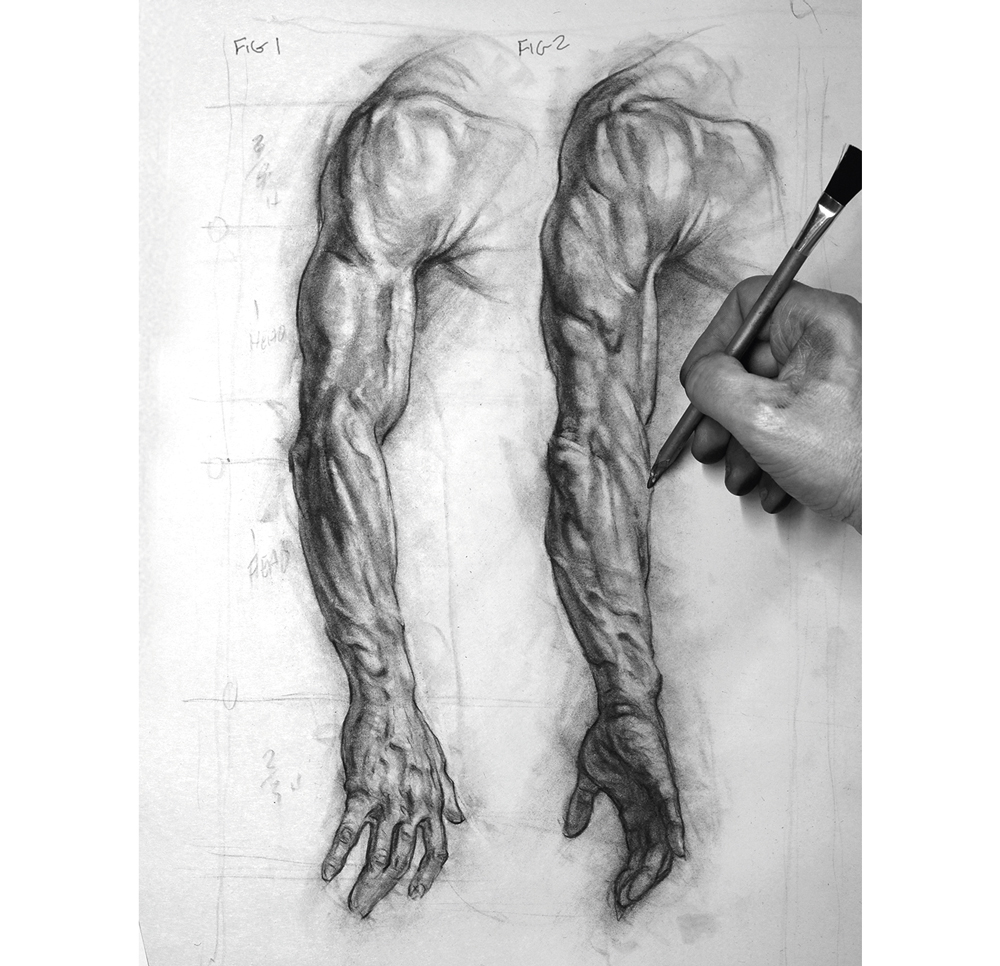
13. Pop the highlights

Using charcoal and tissue I smudge and rub into the background to provide a grey tone that visually 'pops' the highlights of the flesh by providing contrast. For softer highlights I use a kneadable eraser, moving down the arm as before, swaying in rhythm, always drawing, and moving it side to side.
14. Remember nobody's perfect

With all the hells avoided, we end with a study that is neither too gesturally floppy nor too structurally stiff. Proud of myself, I self-indulge in a bit of needless render, adding tiny details such as wrinkles and veins. Yes, I've creaked open the sinful doors to render hell again, but hey, nobody's perfect.
The pronated arm study sheet
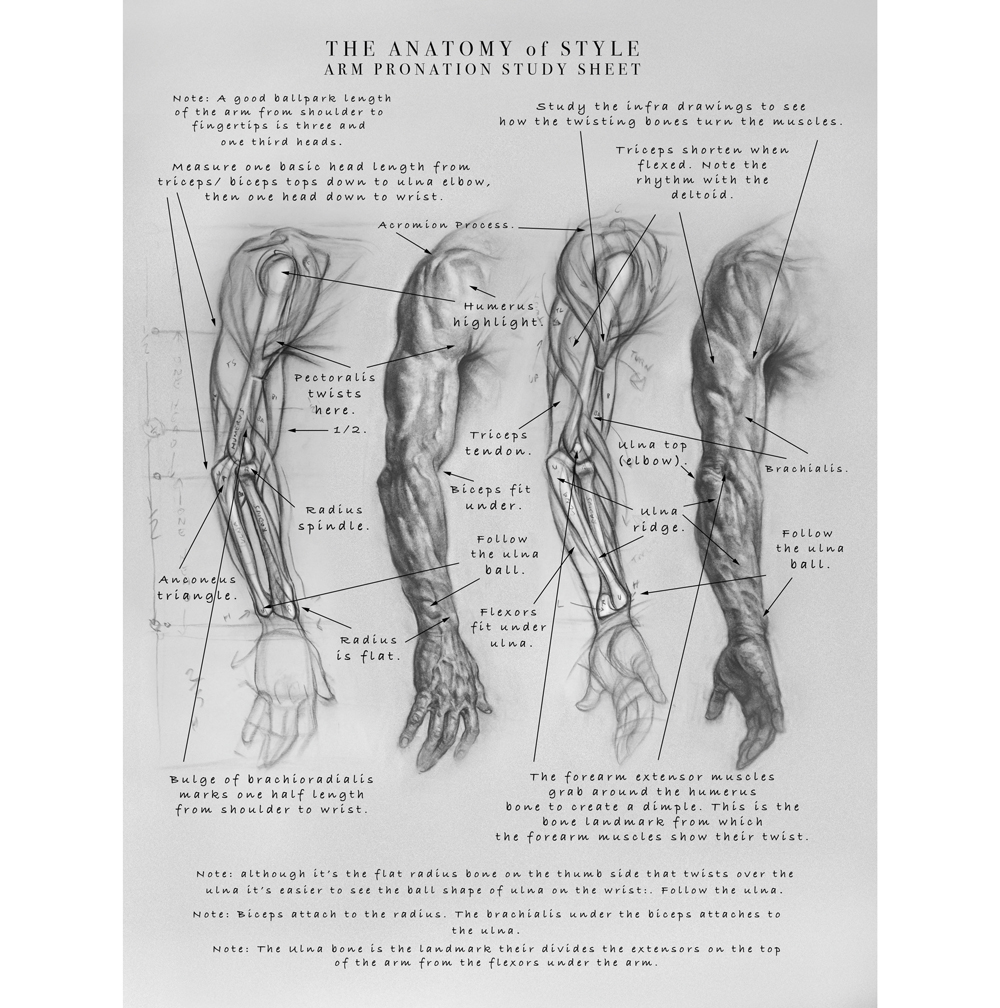
When the palm is up, the hand position is know as supination. When the palm is down, it's called pronation. With pronation, we turn the thumb toward our body, twisting the muscles attached to the radius bone across the ulna bone, much like a bunched-up towel.
A good ballpark length of the arm from shoulder to fingertips is three-and-one-third heads. Note that although it's the flat radius bone on the thumb side that twists over the ulna, it's easier to see the ball shape of the ulna on the wrist. Just follow the ulna.
You can also see that biceps attach to the radius, while the brachialis under the biceps attaches to the ulna. Finally, the Ulna bone is the landmark that divides the extensors on the top of the arm from the flexors under the arm.
This article was originally published in ImagineFX , the world's best-selling magazine for digital artists. Subscribe to ImagineFX .
Read more:
- How to draw muscles
- How to draw a figure
- The best pencils for colouring, drawing and sketching
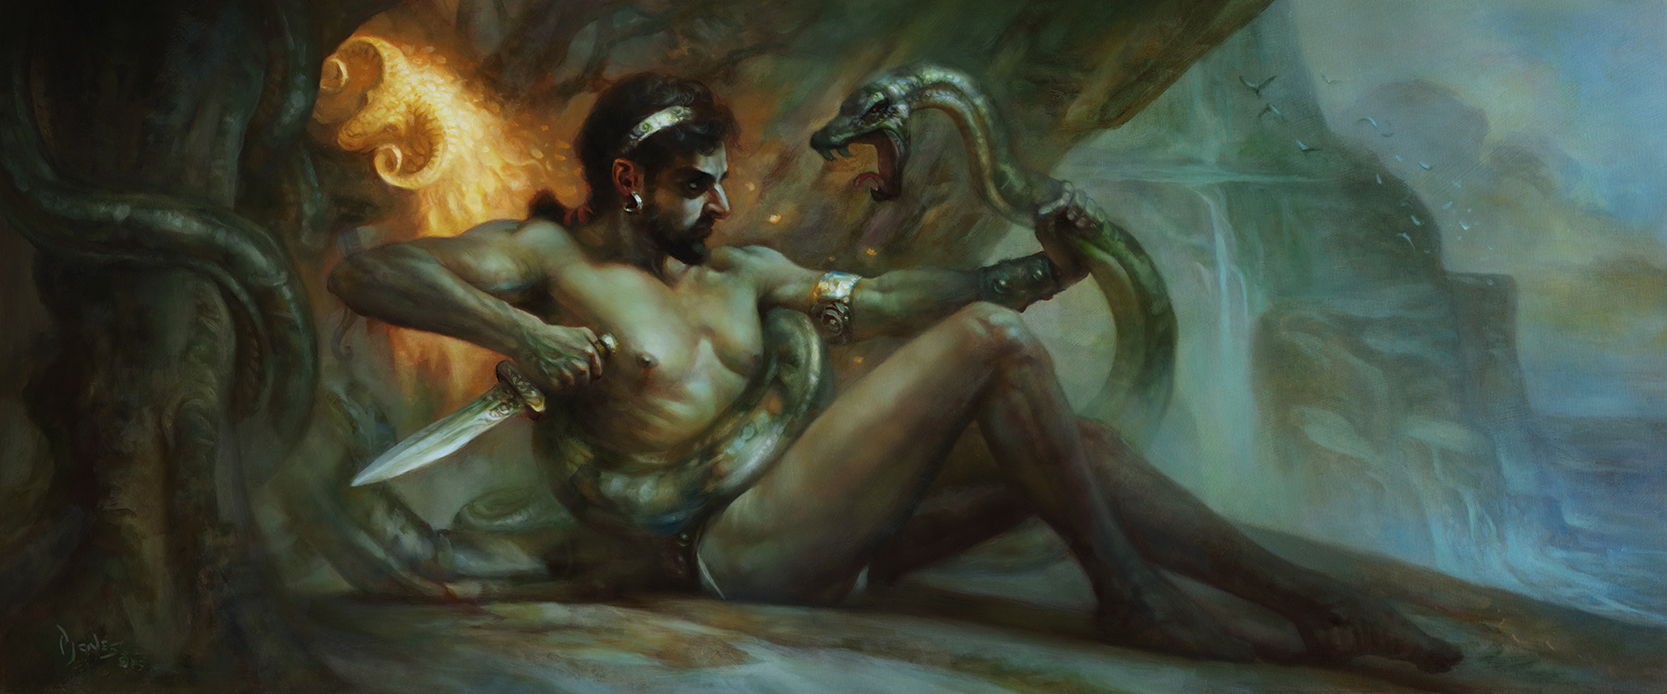
Patrick J Jones is an artist, teacher and the author of Sci-fi & Fantasy Oil Painting Techniques, The Anatomy of Style and The Sci-fi & Fantasy Art of Patrick J Jones.
Related articles
how to draw a muscular arm
Source: https://www.creativebloq.com/how-to/draw-an-arm
Posted by: comesbeamer.blogspot.com
0 Response to "how to draw a muscular arm"
Post a Comment